Are you looking to create the perfect patio? Well, why not? Patios are an extension of the house and living space so it is worth the time, energy, and funds to invest in research and design.
As an example, I’ll use the York Cape Expansion project to show you my process when designing a patio.
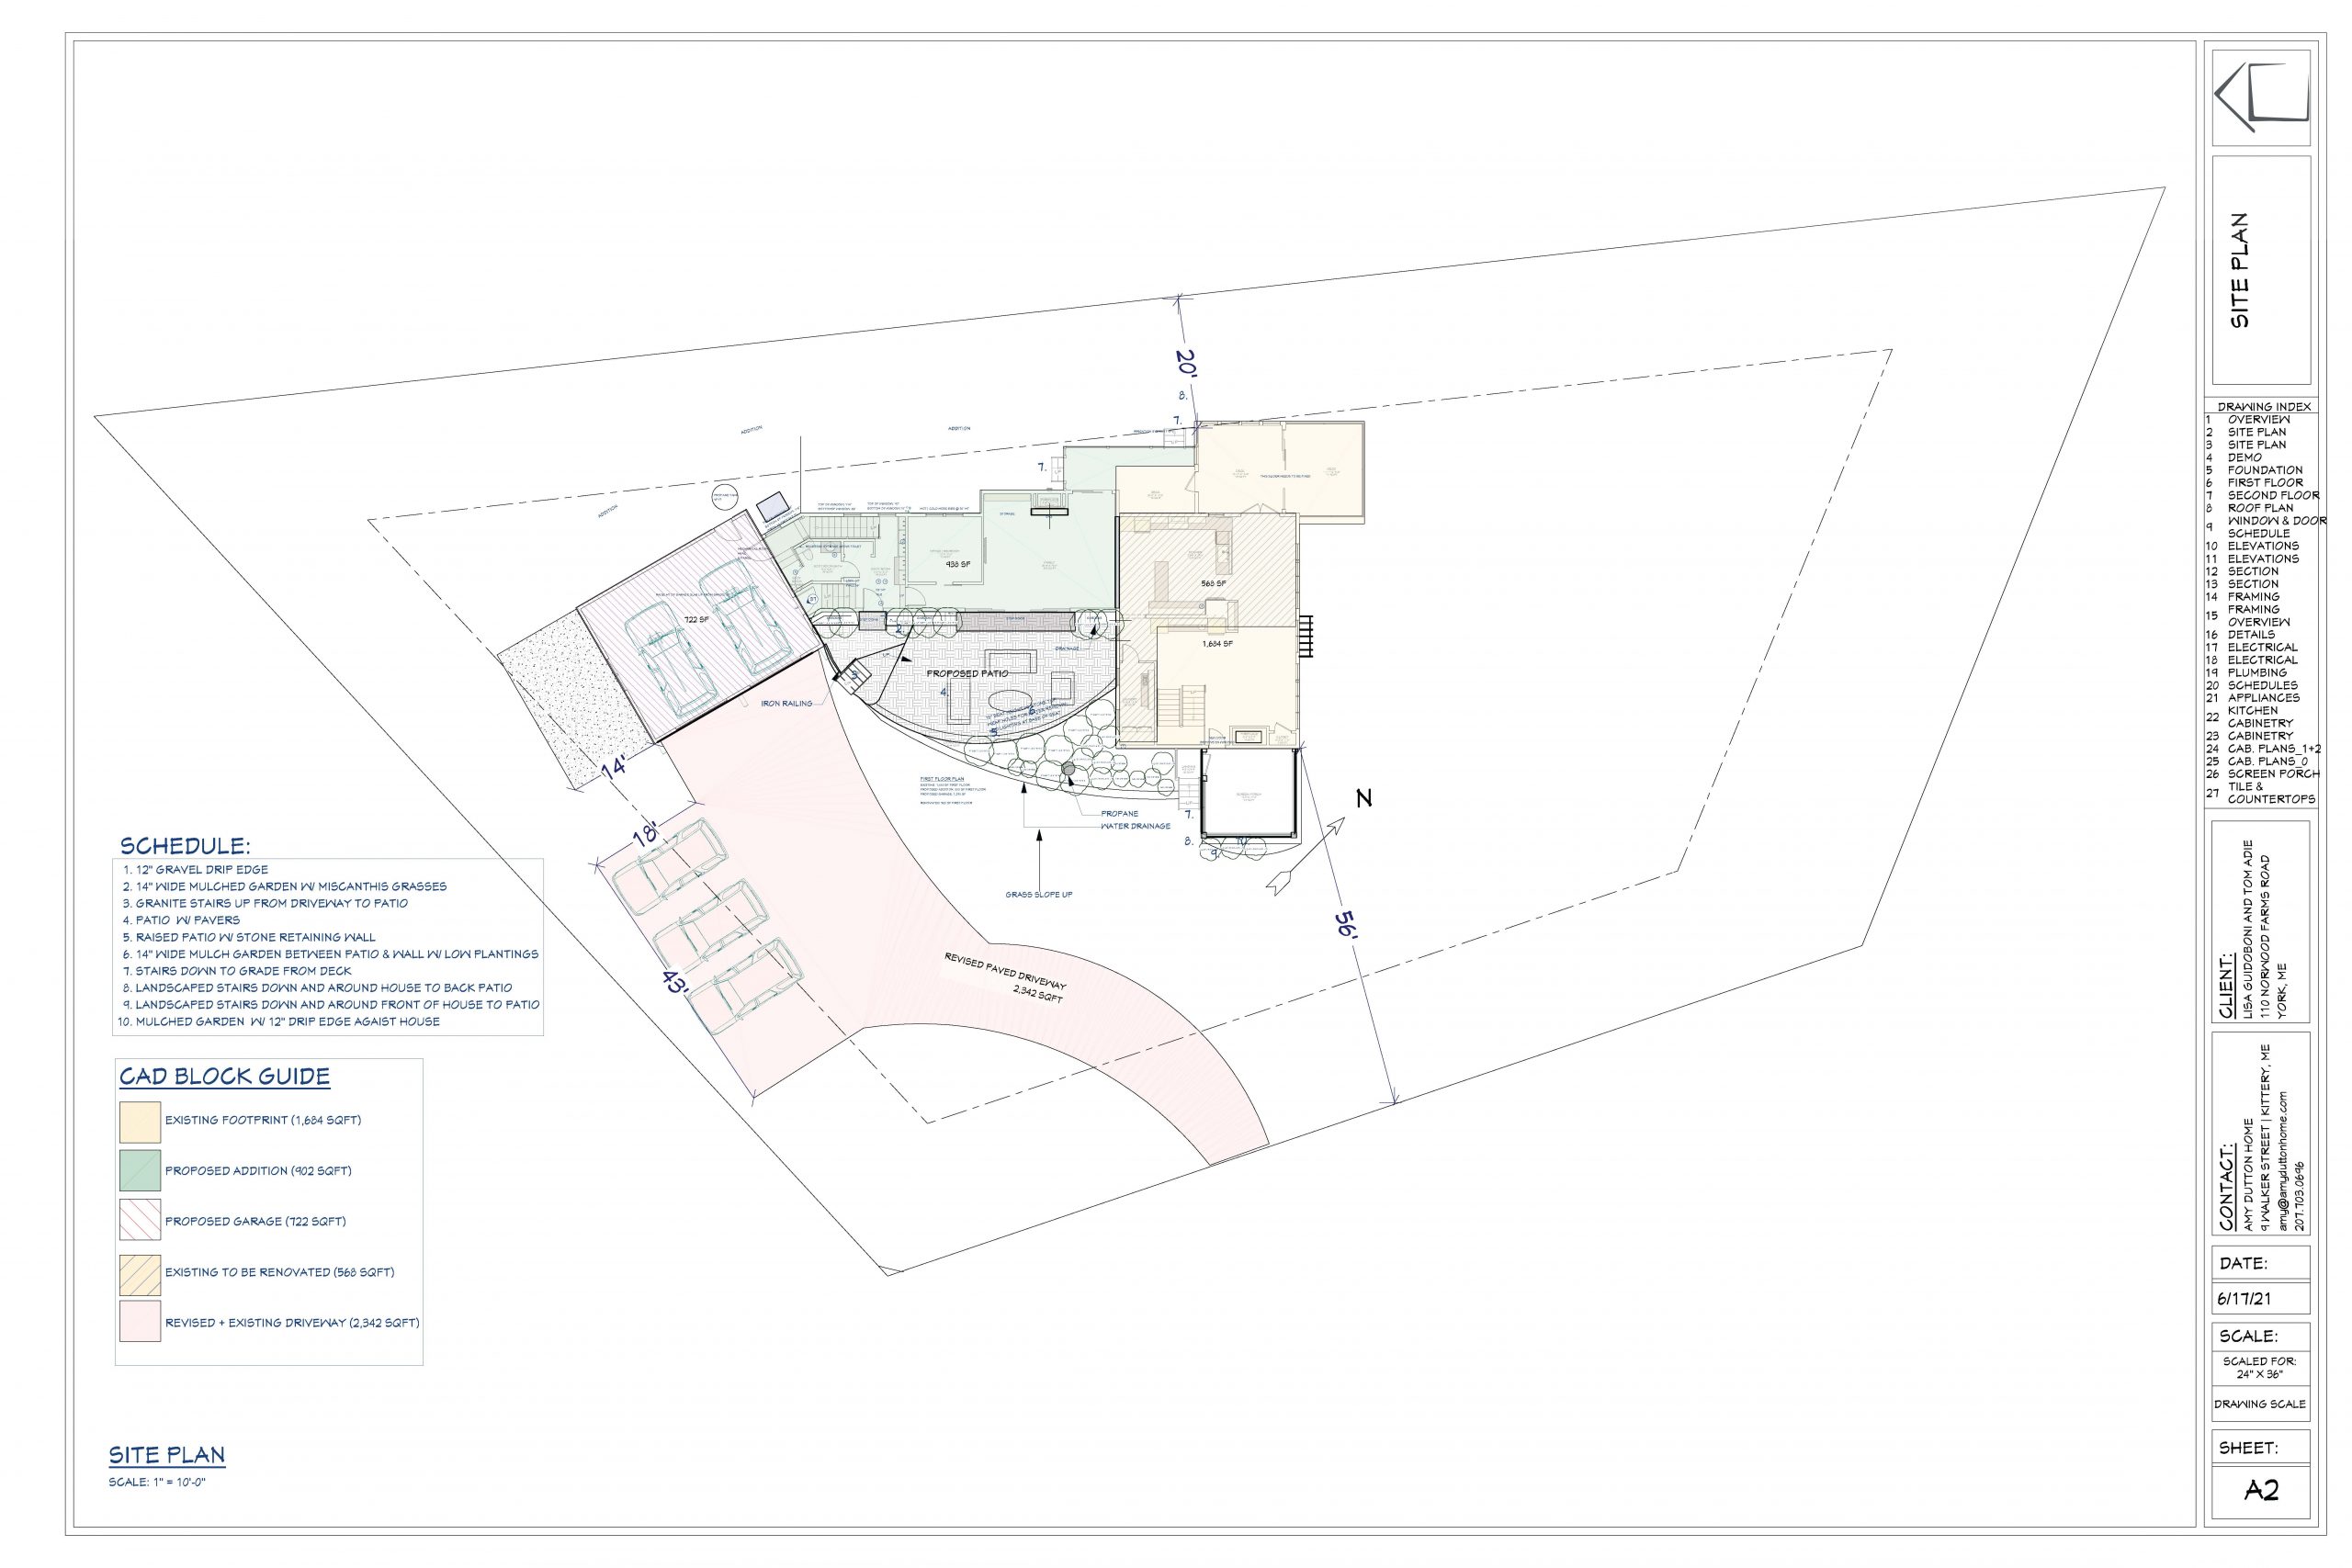
EXISTING CONDITIONS:
The patio was a key component to the design concept of the addition because it connects the existing house to the connector and also the garage as well as the new screen porch. The elevation change from the street to the first floor is about 72” so we needed to gracefully design changes of grade. We are also contending with ledge rock so excavating down was not a cost-efficient option. Lastly, there is an ocean view from the proposed patio and so the higher our clients can sit, the better the view.
SIZE + SCALE:
The size and scale are important to consider as the patio connects the structures as well as the desired use by the homeowner. The clients wanted to be able to have a few sofas, chairs, and coffee tables out there to connect the living room to the patio. We also have a deep roof overhang and many roof connections so we needed to create a drainage system within the patio. Since furniture sitting on this drainage system would be a bad idea, this is what determined the depth of the patio toward the road. A nice soft curve was created with the edge being 18” high to also function as seating.
ACCESS:
Since we have approximately six feet to move from the street level to the patio, the surface of the patio will be three stairs down from the first floor, or 21” which is 14” lower than the transitional mudroom level. The driveway will slope up to the garage-level steeper towards the road in order to create a flatter area at the base of the patio connection to the garage. Stone stairs will walk up from this level and then stone stairs down again against the exterior wall connecting to the new screen porch.
PLANTING BEDS:
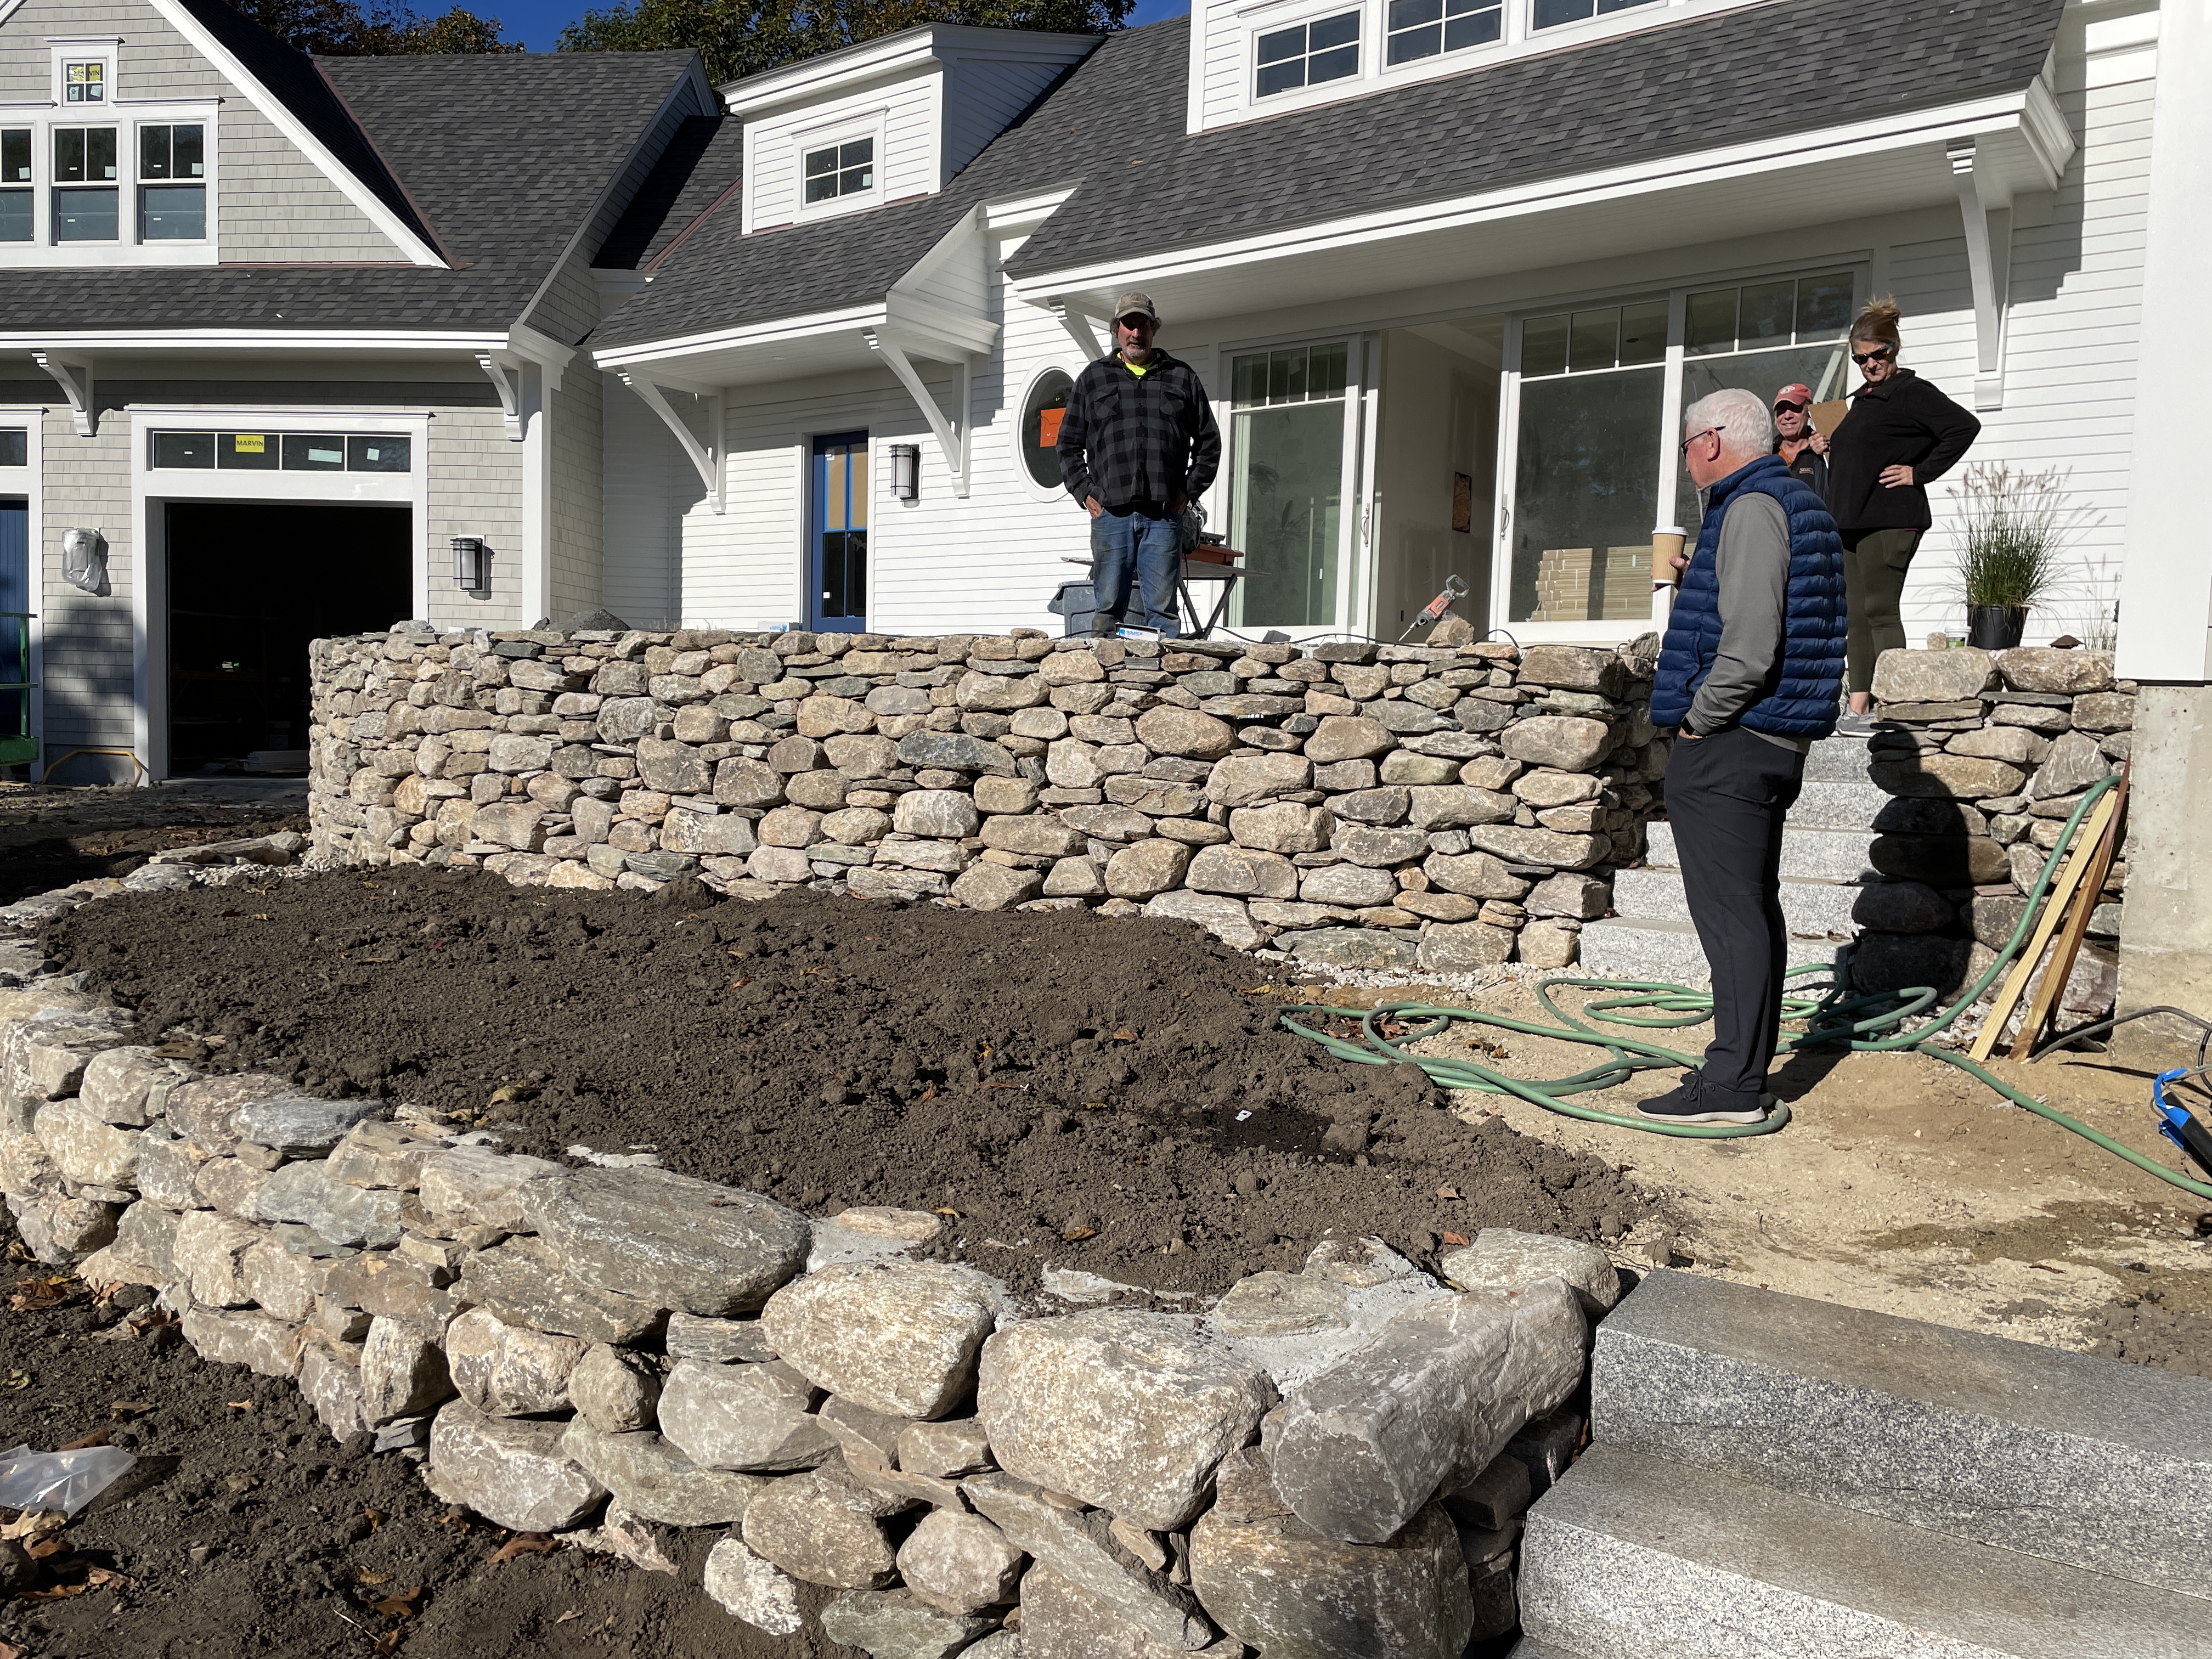
It is always good to have a visual green buffer between two hard surfaces. Therefore, there will be a drip edge 18” deep of beautiful round river stones, then an 18” planting bed retained by granite cobblestones. This will raise the planting bed just about 3” or so and then the bed will be mulched. Inside these beds will be miscanthus grasses. These grasses can withstand snow and ice in the winter since they are cut all the way down and will create a nice moving green shape in the spring, summer, and fall. There will also be a planting bed on the side of the staircase towards the garage for annuals.
There will be another planting bed in front of the patio. This will be a wall of about 30” high and provide the visual buffer between driveway and patio instead of having a 4’6” wall. Grass will slope toward the driveway from this wall to get to the street level.
Many meetings with the landscaper were involved in this design to take the concept from paper to reality. It also became a timeline issue with the builders to make sure they had their roofing, siding, doors and windows installed first so that the patio could be installed without disrupting their work. The end result is a beautiful, functional patio that connects the home to nature with a beautiful view.
Stay tuned as we post next spring and summer more photos of the finished and blooming landscape!